If you want to use Poll Everywhere for graded activities in your Blackboard course, Poll Everywhere integration (also known as LTI) makes this possible. To begin using the Poll Everywhere LTI connection in your Blackboard course, follow each section below.
Content Sections:
Poll Everywhere Blackboard Set-up
First, navigate to your course in Blackboard. From here, you will establish a location for your Poll Everywhere setup. The setup is only visible to instructors.
- Navigate to your Course Information (start here) area, or the content area of your choice.
- Use the Build Content tab to display a list of options.
- Select the option for Poll Everywhere.
- If you do not see the Poll Everywhere option, contact us at lebowintech@drexel.edu to turn the tool on for your course.
- On the Create Poll Everywhere page, enter “Poll Everywhere LTI Link” for the “Name” field. Using this consistent naming helps in the event that troubleshooting is needed.
- Scroll down to the “Options” section and select No under “Permit Users to View this Content.” This step is important so that students don’t click on this link.
- Click the Submit button to finalize the Poll Everywhere LTI Link creation.
- This new link will be visible only to the instructor:

Connect Blackboard and Poll Everywhere
Next, you will need to establish a connection between your Blackboard course and Poll Everywhere. Doing this will allow Poll Everywhere to pull user information from Blackboard.
- To start, click the Poll Everywhere LTI Link created earlier
- If you are not signed into Poll Everywhere already, you will be prompted to log into your LeBow Poll Everywhere account. If you do not have an account that is tied to the LeBow license, contact lebowintech@drexel.edu.
- Once you are logged in, the Poll Everywhere website will appear, along with a prompt to “Continue to LMS to Login.” Click on Continue to developer.blackboard.com.

- At this stage, Blackboard and Poll Everywhere will be connected. On the “LMS Import/Export” page that appears, you should see your course name in the main header. Click the Sync roster button. This step will send your course roster to the Poll Everywhere system and automatically create accounts for your students.

- A page will appear with a notice that the roster is processing in the background. Click the Go to Participants page button.
- Note: Your participants may not immediately appear on the Participants page. Large roster imports may take several minutes to complete.

- Note: Your participants may not immediately appear on the Participants page. Large roster imports may take several minutes to complete.
- Once the import process has finished, your class roster will appear on the Participants page.
- Note: Each course that you integrate with Poll Everywhere will have a unique color assigned to it.
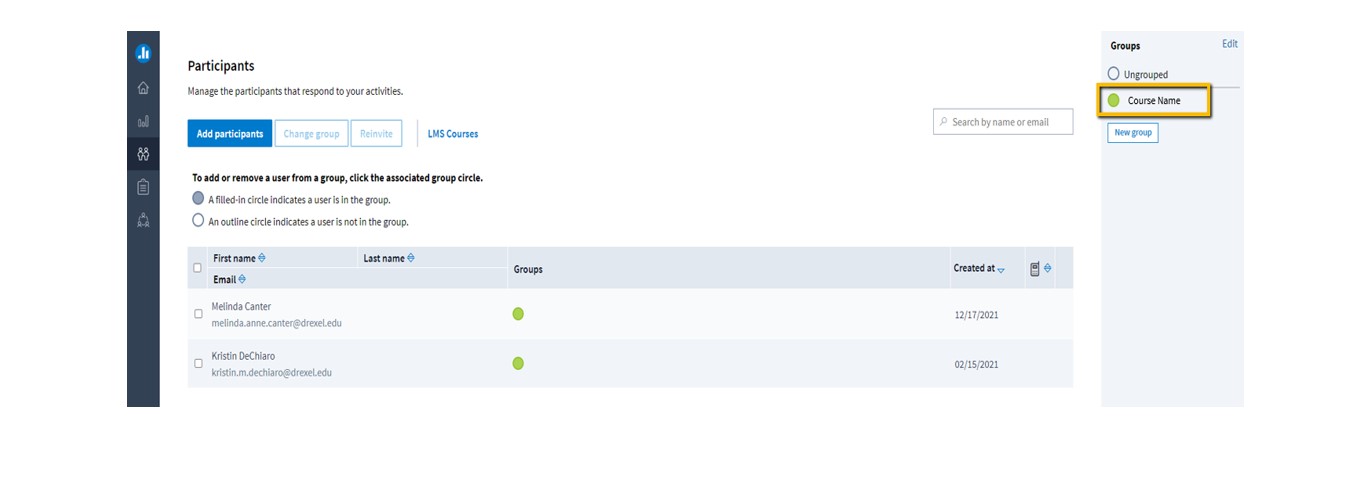
- Note: Each course that you integrate with Poll Everywhere will have a unique color assigned to it.
First Poll Settings
When setting up your first poll for a class, it is important to have the proper settings enabled so only your students can participate.
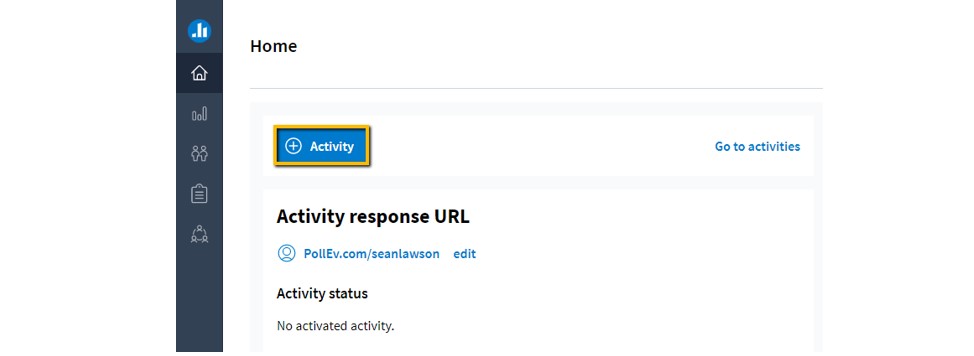
- Once logged in your Poll Everywhere account, click the Activity button:
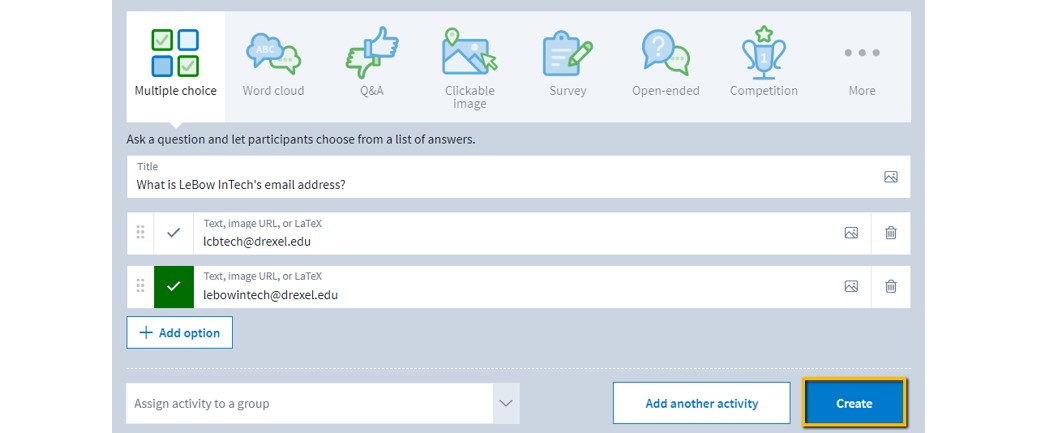
- Select the question-type you would like to use, and fill out the question details in the fields provided below. When finished, click Add Another Activity.
- Repeat this process until you have created all of your questions for this poll.
- To finalize your poll activities, click the Create button.
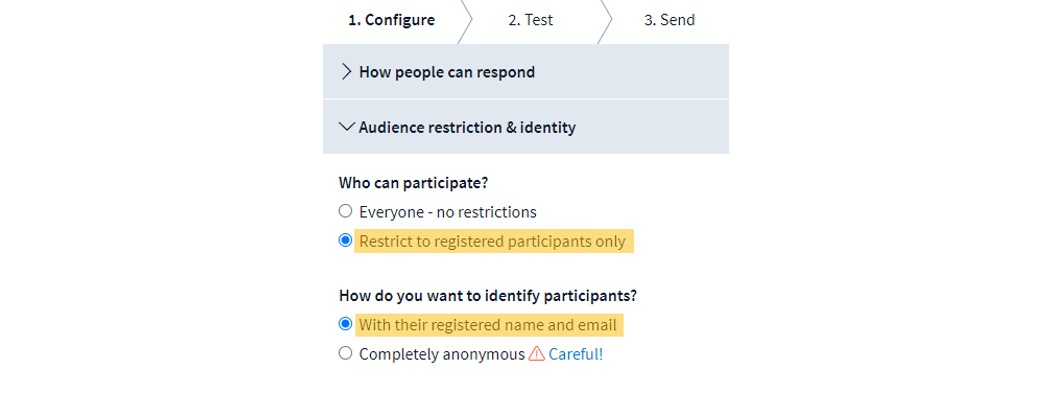
- On the preview page of the poll, under the Configure section, click the Audience restriction & identity heading.
- For Who can participate, select Restrict to registered participants only.
- For How do you want to identify participants, select With their registered name and email.
- Click the Test tab in the presenter page to view a preview of the poll as it would appear on a web browser or mobile device.
- Click the Send tab to view presentation instructions and links for sharing and embedding the poll:

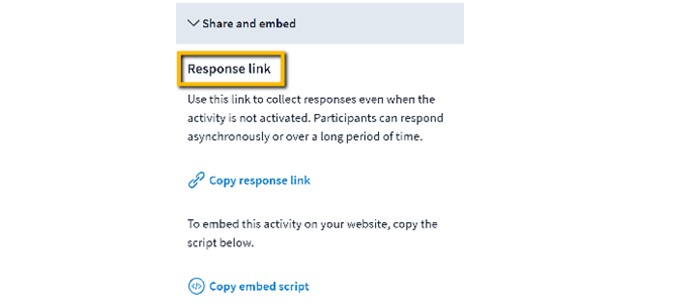
- The response link can be shared so that participants can respond asynchronously, even when the poll is not activated.
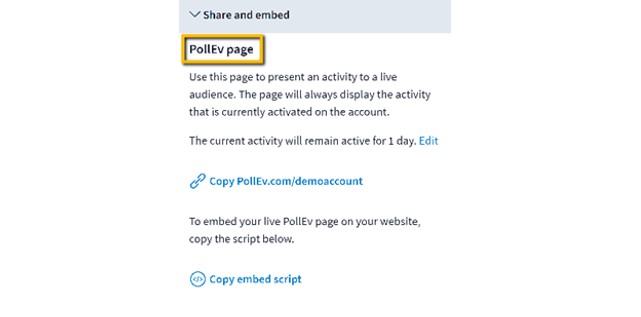
- The PollEv page link can be used to present the poll to a live audience. The link will only display the poll that is currently activated.
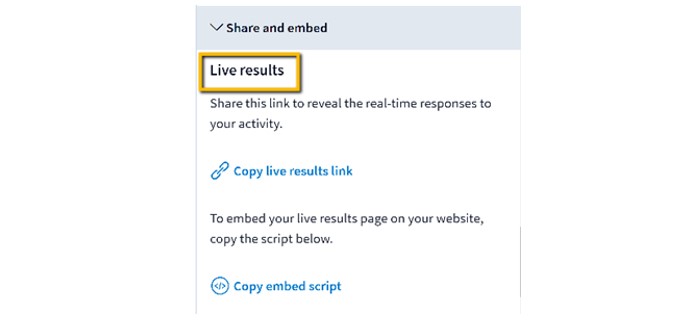
- The live results link can be shared to reveal responses in real-time.
- The response link can be shared so that participants can respond asynchronously, even when the poll is not activated.
Student Poll Link
Go back to your Blackboard course to create a web link that students will use to access the Polls for class.
- Navigate to your Course Information (start here) area.
- Use the Build Content tab to display a list of options.
- Select the option for Web Link.
- On the Create Web Link page, enter “Join the Poll” for the Name field.
- Paste your URL link for your polls into the URL field.
- Scroll down to the Description section and add the URL.
- Click the Submit button:

Conducting your Poll
To start your poll and collect student responses, follow these steps:
- During a live lecture, you will share your screen with your students. Sharing your screen is required for students to see any feedback.
- Navigate to your Poll Everywhere account and open the poll activity you would like to present.
- Now you can start this poll by either clicking Activate or Present. Both options will start the poll and allow student responses.

- To hide results from students, adjust the slider to Instructions. Clicking on Responses will present students’ answers in real-time, and if your poll has a correct answer, Correctness will show the percentage of correct responses.
- To end the poll and prevent further responses, click the Deactivate button or exit full screen.
If you have any questions about using Poll Everywhere in your course, please contact the LeBow Instructional Technology team at lebowintech@drexel.edu.