Kaltura Capture is an easy-to-use tool for recording lecture videos, and for capturing presentations and processes on your screen. Since Kaltura Capture is integrated directly with Drexel Streams, Drexel’s primary video platform, using it to record can help streamline the process for adding videos to your courses in Blackboard.
One advantage of Drexel Streams is that it has no storage retention limits – all videos are stored long-term, and they will not be deleted unless done manually.
Downloading Kaltura Capture
Step-by-Step
- Log into Drexel One
- Click on Campus + Community
- Locate the Technology Services section on the bottom right of the page
- Click on Drexel Streams
- Click Add New at the top right and select Kaltura Capture from the menu
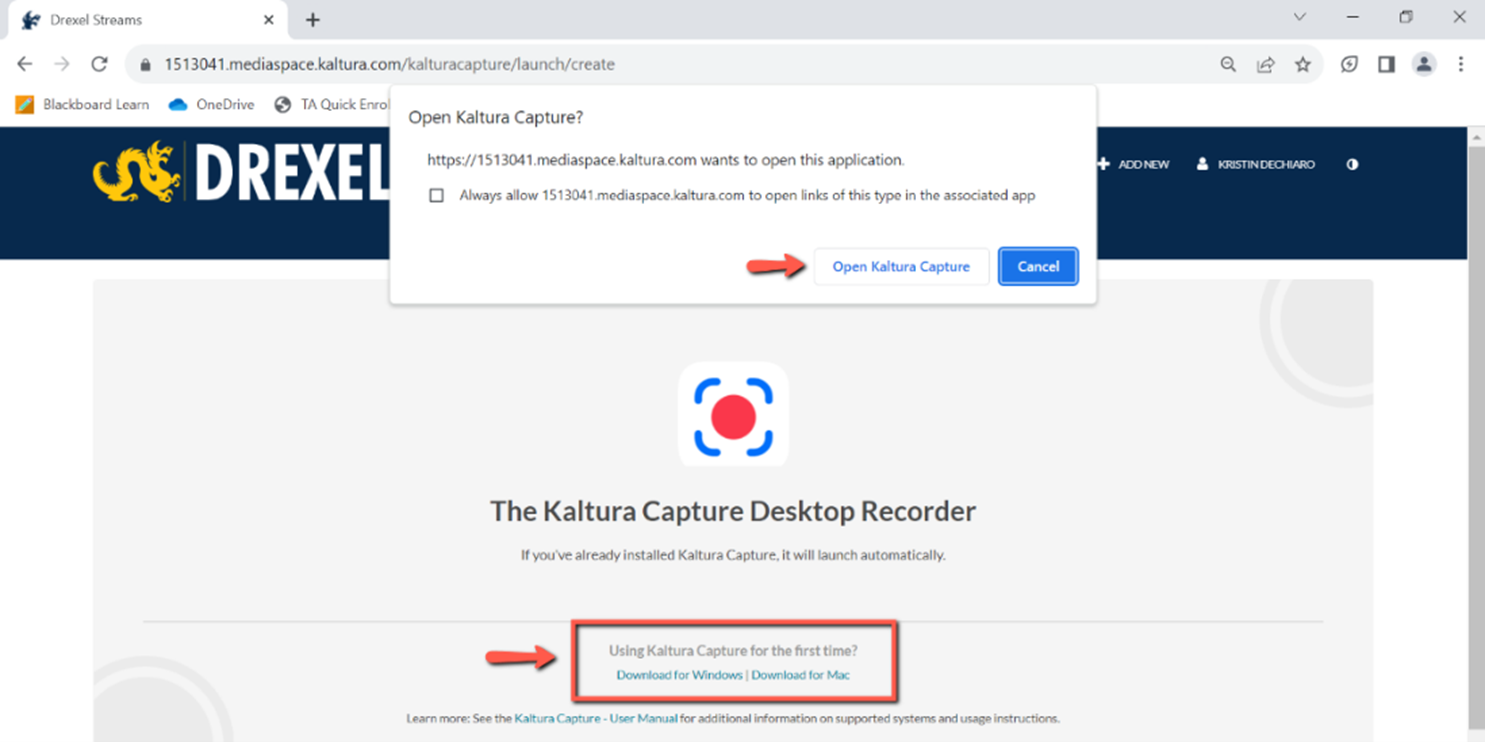
- If the software is already installed, you will prompted to launch it. Otherwise, you will be prompted to download the software.
- Below the “Using Kaltura Capture for the first time?” heading, you can choose to download the software for Windows or for Mac.
Recording with Kaltura Capture
Step-by-Step
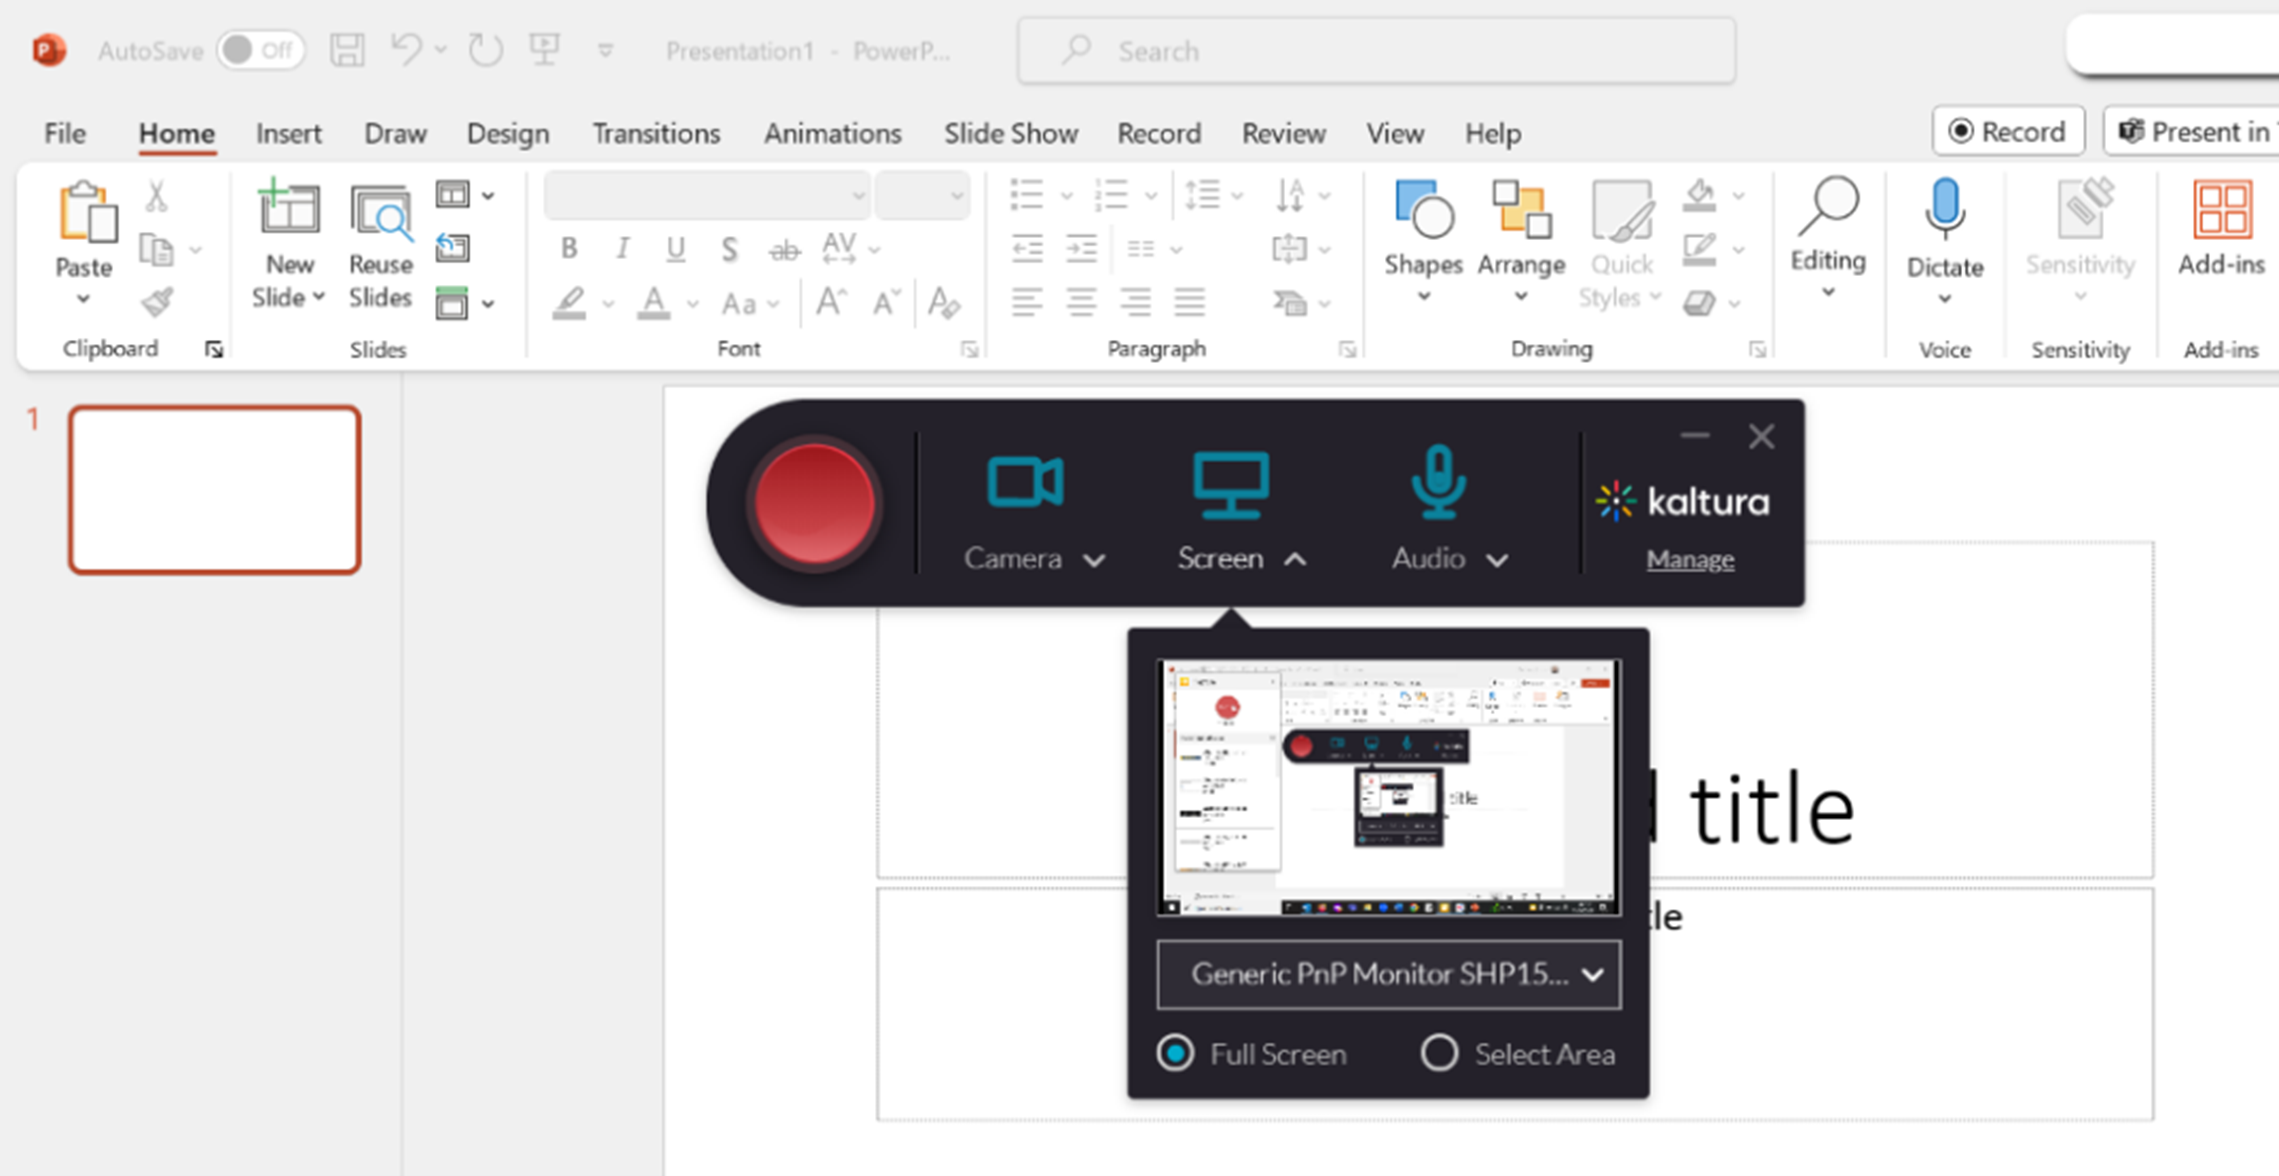
- After you’ve opened your PowerPoint, Word Document, or other onscreen materials for your video, open the Kaltura Capture software.
-
Click the dropdown arrow next to each icon (Camera, Screen, Audio) to specify which devices you would like to use. This is important if you have multiple webcams, monitors, or microphones available.
Note: When recording the Screen, you can either select Full Screen or a specific area of the screen to record
-
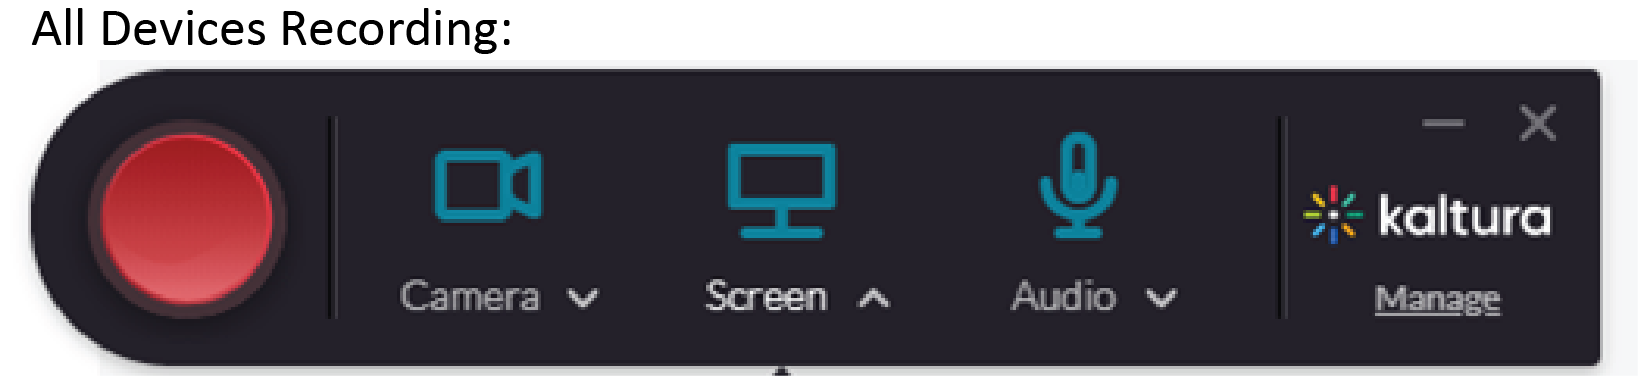
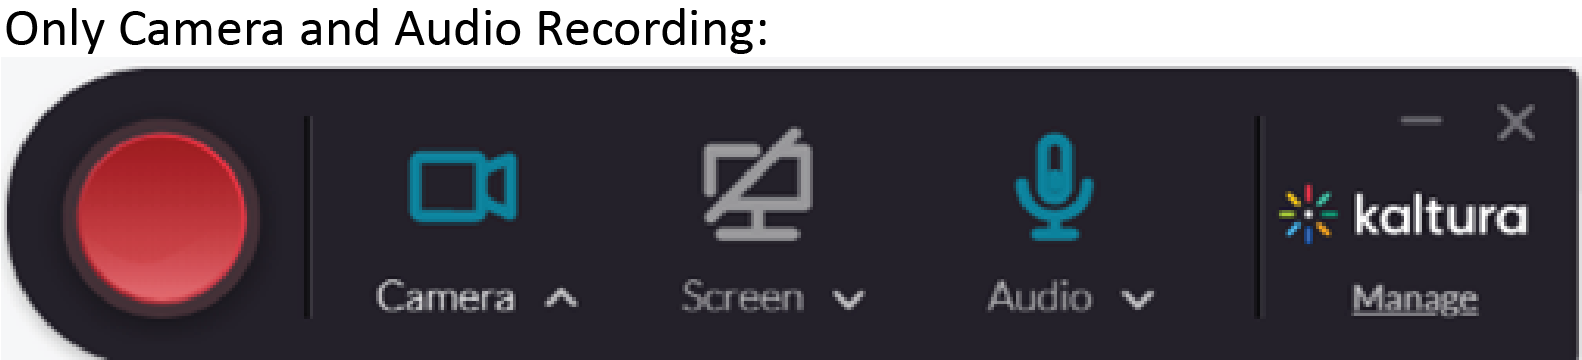
Click on each icon to enable/disable them being recorded in this session. If an icon is outlined in blue, that input will be recorded; if an icon appears gray with a slash through it, that input will not be recorded.
Screenshot 1 (below) shows that all devices are recording, while Screenshot 2 shows only the camera and audio being recorded:
-
Click the Red Circle button to begin recording. You will see a countdown timer appear. Wait to begin speaking until the countdown timer has disappeared.
-
Once recording begins, a small set of recording controls will appear on the bottom-right of the screen.
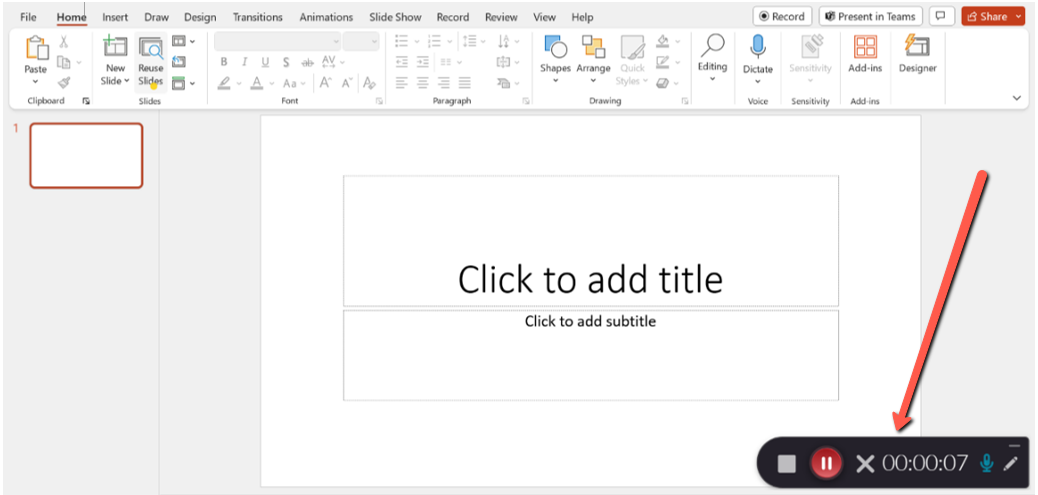

- The following functions are available while making your recording:
- Square: Stop (which will save the recording)
- Red Circle: Pause or Resume recording
- ✕: Cancel the recording (without saving)
- The timer indicates how long you have been recording
- Microphone: Mute or un-mute the microphone while recording
- Pencil: Annotate on the screen
- The line at the top right will minimize the controls. You can maximize the interface again by selecting the Kaltura Capture software icon in your computer’s toolbar.
Reviewing, Saving, and Posting Your Video
Step-by-Step
- Once you finish your recording, you can watch and review it
- Title your video and optionally add a description and tags
- Click Save & Upload to upload it to Drexel Streams
- Once the file is uploaded, follow the instructions for Adding Videos from Drexel Streams to Blackboard or Sharing a Drexel Streams Video Outside of Blackboard
Note: Any video uploaded to Drexel Streams will need to be processed and may not be playable immediately after upload. Longer form videos may take longer to process.
If you have additional questions about recording or Drexel Streams, reach out to LeBow Instructional Tech at lebowintech@drexel.edu.